

Yes, it's unusual for me to do nail art twice in a week but I think this is the result of the stress I got from work. Doing my nails is my one way to be stress-free for a moment and it's my outlet to escape for the meantime from all the blahs, if you know what I mean hehe. Doing my nails made me calm, relax and make me feel beautiful. So, imagine if you go to the SPA regularly... Wow! In SPA, you will be pampered as much as you want. It's the same thing with me also, I pampered myself by having my nails done, got my hair treated (I do it at home only hehehe), giving myself a facial treatment (bought some facial masks from Watsons), waxing unwanted hairs if really needed hehehe, giving myself a foot spa, and spent an hour or two in front of the mirror and doing a make over for myself from hair style to make-up (I'm so so into make-up).
So today, I want to share with you the nail arts I made for the week. The first one, I called it Goldy Floweret’s which I made last Sunday and the second one is called Minty Loved Flower which I made tonight.
Here’s the step by step instruction in achieving the Goldy Floweret’s Nail Art.
Step 1.) Apply onto clean nails the L.A. Colors in Wave Length or any regular polish in Gold as your base coat. Let it dry.

Step 2.) Using the L.A. Art Deco in Sky Blue, Rose and Bright Green, create small five (5) dots and three (3) small dots to create a tail-like.
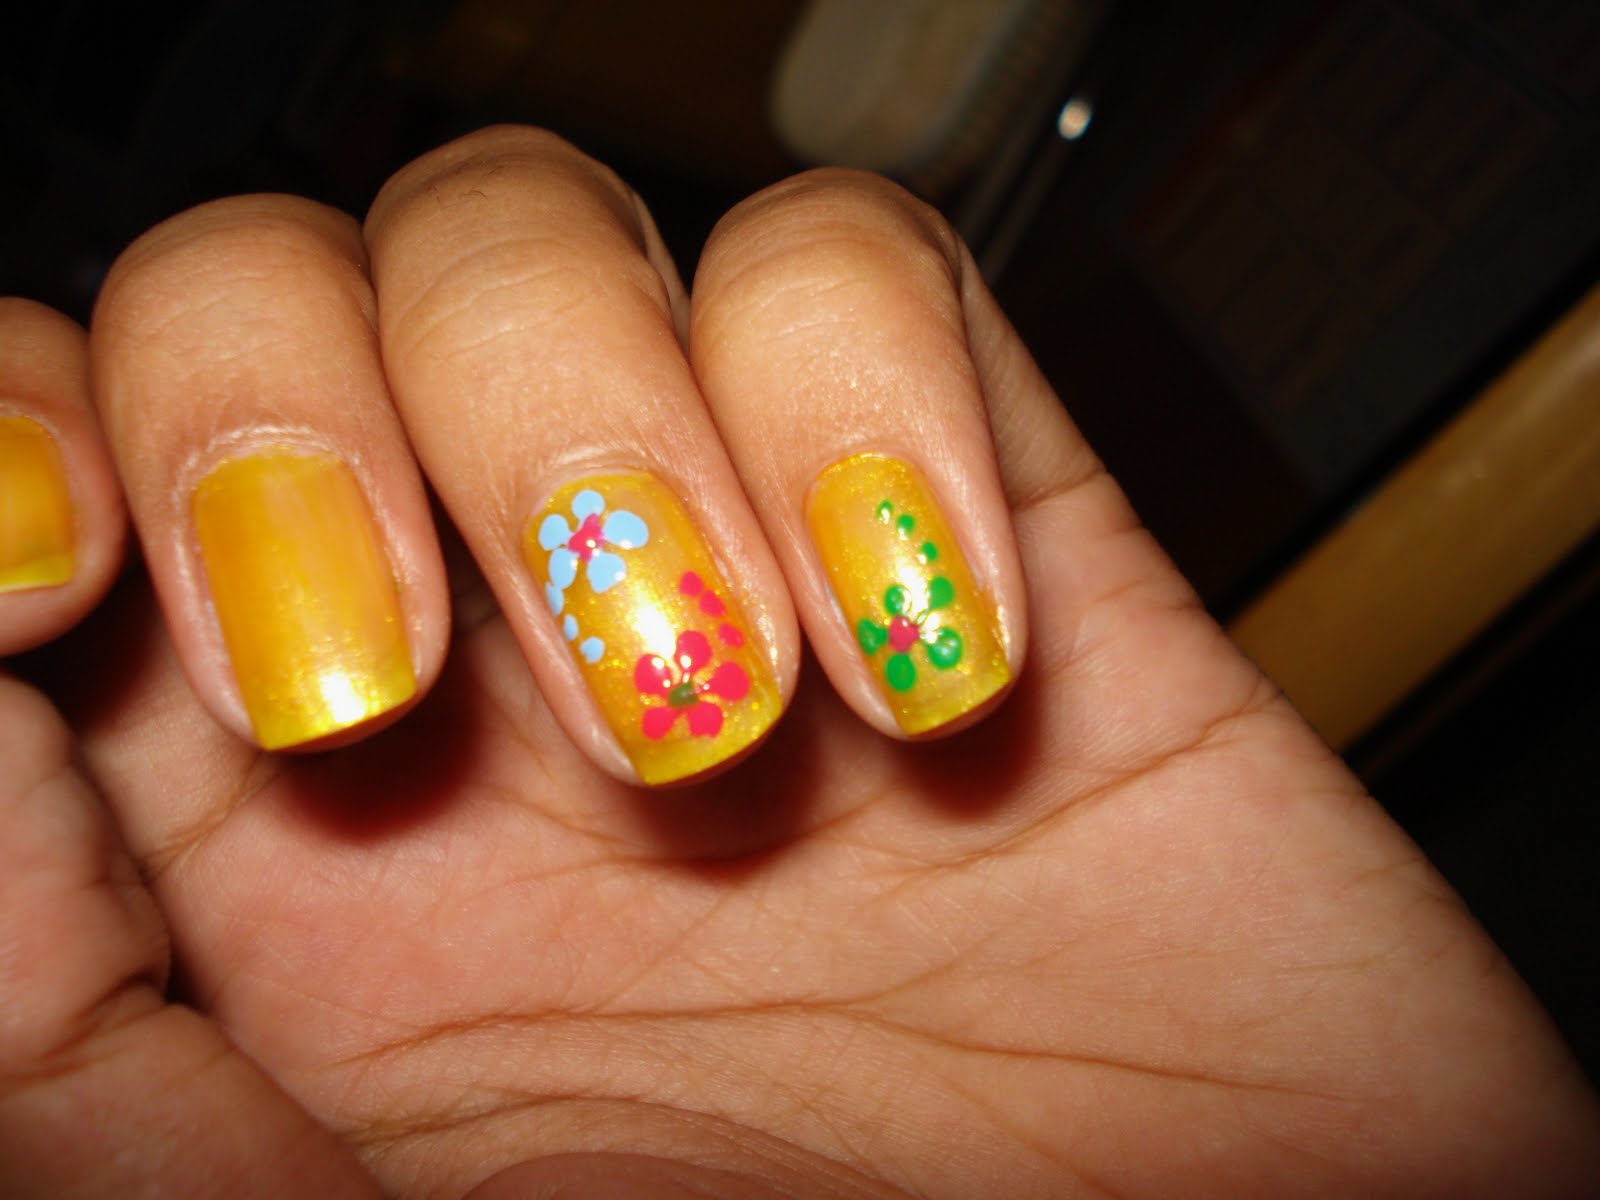

Step 3.) Using a needle or aspili, feather the dots inwards to create a flower. Then, using the polish used in Step#2, put dots for colorful buds. Take note, you can put your choice of colors for the buds.

Step 4.) Lastly, always protect your work of art. Apply your favorite top coat. I'm using Caronia kwik-dry top coat.

Okay, for the Minty Loved Flower nail art that I made, forgive me but please bear with me, I so so love flower designs. I hope you aren't getting bore yet hahaha.
Step 1.) As your base coat, apply onto nails the L.A. Colors in French Nails-Pink. Let it dry. The, after drying, create a French tip using the L.A. Art Deco in Mint Green.

Step 2.) After the French tip dries, create five (5) dots by using L.A. Art Deco in White. Right after dotting, use the needle or aspili to feather the dots onto the center to create a flower.

Step 3.) Using the L.A. Art Deco in Yellow, put dots in each flower you created.

Step 4.) And lastly, as I always said you should protect your nail art by applying a top coat of your choice.


Hey beauties, its still summer. It’s not yet over hehehe. Have a cool summer nails now! This is so perfect for the current weather we have today. Weather is acting like its going to pour a lot of rain but at the end of the day, it did not. Well, I'm sure in the other places the rain really poured so hard. So lucky them!
If you notice, I don’t have a photo of my toes done. I didn’t because I cut them so short last week when I started to use my 4 inches high heels. I have no choice but to cut my toe nails really short or else, it will damage my nails and will cause me a horrible pain. I was sad but now I’m okay, I already moved on (drama effect hehehe).
I hope you learned something again from this tutorial. I really appreciate you beauties of dropping by in my blog.
Stay cool!
Jenniya
