Showing posts with label L.A. Colors. Show all posts
Hi everyone! It's been a custom for others (including me) to wear polka dots on New Year. Mostly says that it will bring you luck the entire year if you wear rounded designs in your body. It can be your clothes, shoes, head accessories and anything that you will wear on the night of 31st of December to welcome the New Year.

There is no limitations how heavy dots you can wear, so I think of why not doing it more in a fab way? So, today I recreated Easy Polka Dots by cutepolish. By the way, my previous Kiwi nail art was also a recreation from cutepolish.

Easy Polka Dots

So, let's get started.

Step 1. Prepare the nail polishes and other tools.
- Elianto in Twilight (black)
- Caronia in Regular White
- L.A. Colors Art Deco in Gold Glitter; or
- Caronia in Frosted Platinum Glitter
- Caronia Fast-Dry Top Coat
- a toothpick
- CD/ Disc; &
- a tape.

Step 2. Cut a tape and paste diagonally onto nails. 

Step 3. Take the regular back polish and apply it onto nails just in the bottom section. You just fill-up the space to create a diagonal French tip. Wait for the polish to get dry for approximately 8 minutes.

Step 4. If it's already dry, take-off the tape by pulling it from the bottom.

Step 5. Put the regular white polish in the CD. Dip your toothpick in the polish and dot it onto nails.
It is your choice of filling polka dots to all your French tips; or
... you might want to try leaving your two (2) nails undotted; or
... you prefer only one (1) nail undotted. 

Step 6. In this step, from the two (2) glitters polish, I opted to use the L.A. Colors in Gold Glitter because of it tiny brush. I find it very easy to line the upper tip. 

Step 7. Finished your nail art with your favorite top coat.
Ta-da!

Meet Pnoy bear..

Do you find it easy?

simply jenniya
Got questions? Comment below or click here.

Hey everyone! I know, I know. It's been a long while since I last posted. I've been travelling lately and when I came back, I had a lot of things to catch on. Then, I got so busy updating my other blog which is a travel blog. If you have time, please do visit my travel blog - Wanderings.

Anyway, I am back with a new nail art tutorial. Today I will share to you a tutorial inspired by Kiwi fruit.

Kiwifruit - often shortened to Kiwi in many parts of the world. 

Kiwi Nail Art

So, let's get started.

Step 1. Prepare the nail polishes and other tools.
- Regular Black and White polish
- Frosted Light Green polish
- Toothpick
- Disc/ CD

Step 2. Apply the regular white polish onto nails. I did apply first a white polish before applying the light green polish to make the green more opaque.

Step 3. After the white polish gets dry, apply the light green onto nails. Apply three (3) coats for nice opacity.
Clean out the excess using a Q-tip soaked from polish remover.

Obtained the perfect same color by 3 coats. Yey!

Step 4. Using the white polish, brush it onto the middle your finger creating an oval shape.

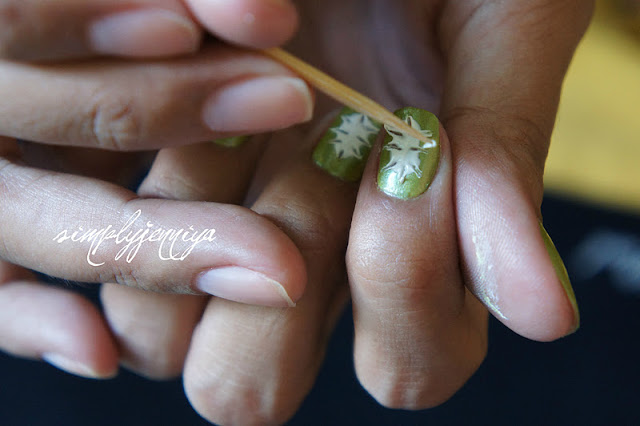
Step 5. After drafting the oval shapes onto nails, put on thick amount of polish onto the oval. Then, take the toothpick and create streaks outward.

Step 6. Pour a little amount of black polish onto the disc/CD. Take the toothpick, dip onto polish and dot it in between of each streak.

Step 7. You're almost done! Now, apply a regular colorless polish to flatten the design. 

Step 8. Of course, I always finished my nail art design with quick dry top coat.

There you have it. Isn't it so easy? 

simply jenniya
Got questions? Comment below or click here.


Oh, it's Friday again. It's another fruitful week for me and my hubby. Do you know that it's only today that we have stayed home? Yeap! Since Monday (it was holiday then), I and hubby were working so hard that we got home late na. I am very happy to say that we have closed 3 deals in just 4 days!

Client 1:
Last Monday, though it was a Holiday, I and hubby worked and fetched our client @ 9:30 am billeted in Makati Shangri-la for viewing of apartments around Makati City particularly in The Residences At Greenbelt (TRAG) and in Salcedo Village. I actually joined them also in their breakfast coz they really insisted and I cannot say no. Hmm, I was a bit shy to know after that the buffet breakfast in Shangri-la cost P900+ per head. Well, they insisted and that was just cost a penny for them I'm sure hehehe. Then, the next day (Tuesday), fetched them again for viewing of other apartment coz they requested to see more for better options. The next day after that (Wednesday) was the decision making. They chose one in Salcedo Village. Then, yesterday (Thursday), I picked-up from their office their reservation for the apartment. Seems so lucky this week eh?

Client 2:
Last Monday, the client paid and signed a contract @ 6:00 pm for a 1-bedroom apartment in Makati Executive Tower 3. This was a very smooth transaction actually coz the moment my client saw the unit, he confirmed already to take the unit and after a week, he paid and signed the contract. What irritated us was that the authorized person forgot to bring her copy of authorization letter to receive and sign the contract in behalf of the registered owner. So, even it was really raining so hard that night plus the terrible traffic, I and hubby followed over the unit owner to Manila where she is residing to get a copy of the letter just to find out that she has no copy of it at all. Hmmm... ang saya hehehe. But thank God, the developer has it so I haven't had a hard time processing the papers for the move-in of our client. 

But the next day (Tuesday), when I was processing the permit, one of the admin personnel of the Cityland developer had a not-so-nice words from me. I don't mean it actually, but I got so pissed of her stupidity. I've paid already all necessary accounts to be paid for in behalf of the unit owner and got permit for my client to move-in, so I thought everything is okay na. But later at noon time, I found out that the permit wasn't complete. Good thing I went to the apartment's reception lobby and personally asked the guards if everything is okay with the permit I handed to them. The guard said, the permit is for the Unit only but the Parking allocated should have another permit. I called up the admin personnel and asked her how come the parking wasn't included in the permits. It was clearly stated in the lease contract I've submitted that the parking is included. She answered in a very stupid voice that I didn't told her it is included. She added, yes it is stated in the contract that there's one but there's no specific allocation or slot number. I got so pissed that I told her quite loud that she has no COMMON SENSE. I came back to their office and I am ready to argue with her but I think she knew my plan. As she saw me approaching, she stood up from her table which at that time she has 5 clients in queue and accommodated me first before I blasted. She said sorry and handed me the other permit. Hayss...

Client 3:
We are supposed to sign contract on August 31 for an apartment in The Columns Ayala Avenue Condominium but then were cancelled and re-scheduled last September 1. Too bad coz the owner wasn't available anymore to meet with us. So, that leave us no choice but to bring the cash payment, contracts and post-dated checks to the owner's house in Alabang or else, my client cannot move-in that day. Phew! I won't tell a story anymore on how we got stuck from traffic in Sucat Exit @ 12:00 noon. Grabe talaga! Thank God, our client already move-in @ 6:00 pm that day.

So today, I considered it our rest day, lols! 

By the way, I also considered my Nail Of The Week (NOTW) brought a lucky charm for me, lols! Last Sunday night, I picked again from my vanity bag one of my never been used nail polishes from L.A. colors.  

 I applied three (3) coats of this nail polish. The 1 and 2 coats will not reveal its true color as same as in the bottle. But for your 3rd coat, the color will really look so nice. I thought it will make my hands darker but it wasn't. It made my hands looks fairer. Yey!

I used L.A. Nail Colors in Current NP414.

I am maintaining my nails as short as that. I noticed that my nail tips are breaking and it is not good. Sometimes it clings to my clothes that caused a little damage. It's a no-no for me, of course. Kaya sige short nails na lang muna hehe.

Since we just stayed home, I did surfing for a place for our next out of town trip. After some googling, I stumbled at Anvaya Cove website. This is somewhere from North. I hope we can push through with our plan. The weather is acting not so good these past few days.

Well, let's see.

L.A. Nail Colors
Current NP414
Retail Price: Php 60.00 each

Available at:
Market! Market!
Fort Bonifacio, Taguig

Stay tuned always.

Jenniya


Hi Beauties! 

Do you miss me posting my nail arts? Ahaha... I wish I have followers, lols! Anyways, I really miss doing nail arts. After our Boracay getaway, I've had a lot of things that needed to catch up and been doing it for a couple of weeks now. Actually, even today, Sunday, we assisted a client in Makati to do a list of things for move-out. So, we got free this afternoon only and finally, I was able to do nail art again. Phew!

Since my mind and body still can't get over of Boracay (hu hu hu, am going back soon Boracay, lols!), I cannot also think of an art. I browsed askmewhats.com blogs about her nail art tutorials and finally, I decided to recreate/ modify her Minty Chocolate Nail Art since this was the first nail art that my Mom tried on to my nails the time she received my gift. My Mom was so happy and couldn't believed she finally owned one. She's been lemming for it for quite a long time. I like the nail art that my Mom recreated for me and so, now, I recreated it too. I don't know if she (Nikki) still remembers me in case she happen to read this. Hehehe, it's from her where I bought the PrettyNails - set of twelve (12) of two-way nail art pens that I gave as gift to my Mom.  Yes, nagmana ako sa Mom ko sa kakikayan hehehe. I was happy to know that all those polish colors she used, eventually I owned a similar polishes, too. Yay!

Minty Pinky Nails 

To start with, you will need the following:

From left: White, Baby Pink, Radiation, Magenta &  Black Sparkles


Step 1.  Start with a clean nails. Apply the L.A. Color Craze in Radiation onto nails. Apply two (2) coats.


Step 2. Make a thin French tip using the L.A. Art Deco in Black Sparkles.


You can either stop here and get this neat French tip design only or...

...go on further.

Step 3. Create five (5) dots using the L.A. Art Deco in Baby Pink, and... 


... quickly feather it inward to create a flower. Then, apply three (3) dots to add more beauty.

Step 4. Make a French tip using L.A. Art Deco in White, apply it thinly as you could. This step can also be make right after your Black Sparkles french tip (refers to Step 2).

Step 5. Using L.A. Art Deco in Magenta, put dots to each of the flower you created for a nice bud.

Step 6. Lastly, always finished your work of art with a top coat. 
My Minty Pinky Nails, yay!

Hope you enjoy my recreated nail art (thanks Nikki of askmewhats.com) for this very cute design.

Stay tuned beauties.


Jenniya

What's up, beauties? Whew! Last week was been very stressful. Actually, up to this week but not that heavy anymore compared to last week. Though I'm quite busy, I still didn't forget to have my nails done and create another work of art. In fact, this week I was able to do two (2) nail arts. Yeap! 

Yes, it's unusual for me to do nail art twice in a week but I think this is the result of the stress I got from work. Doing my nails is my one way to be stress-free for a moment and it's my outlet to escape for the meantime from all the blahs, if you know what I mean hehe. Doing my nails made me calm, relax and make me feel beautiful. So, imagine if you go to the SPA regularly... Wow! In SPA, you will be pampered as much as you want. It's the same thing with me also, I pampered myself by having my nails done, got my hair treated (I do it at home only hehehe), giving myself a facial treatment (bought some facial masks from Watsons), waxing unwanted hairs if really needed hehehe, giving myself a foot spa, and spent an hour or two in front of the mirror and doing a make over for myself from hair style to make-up (I'm so so into make-up).

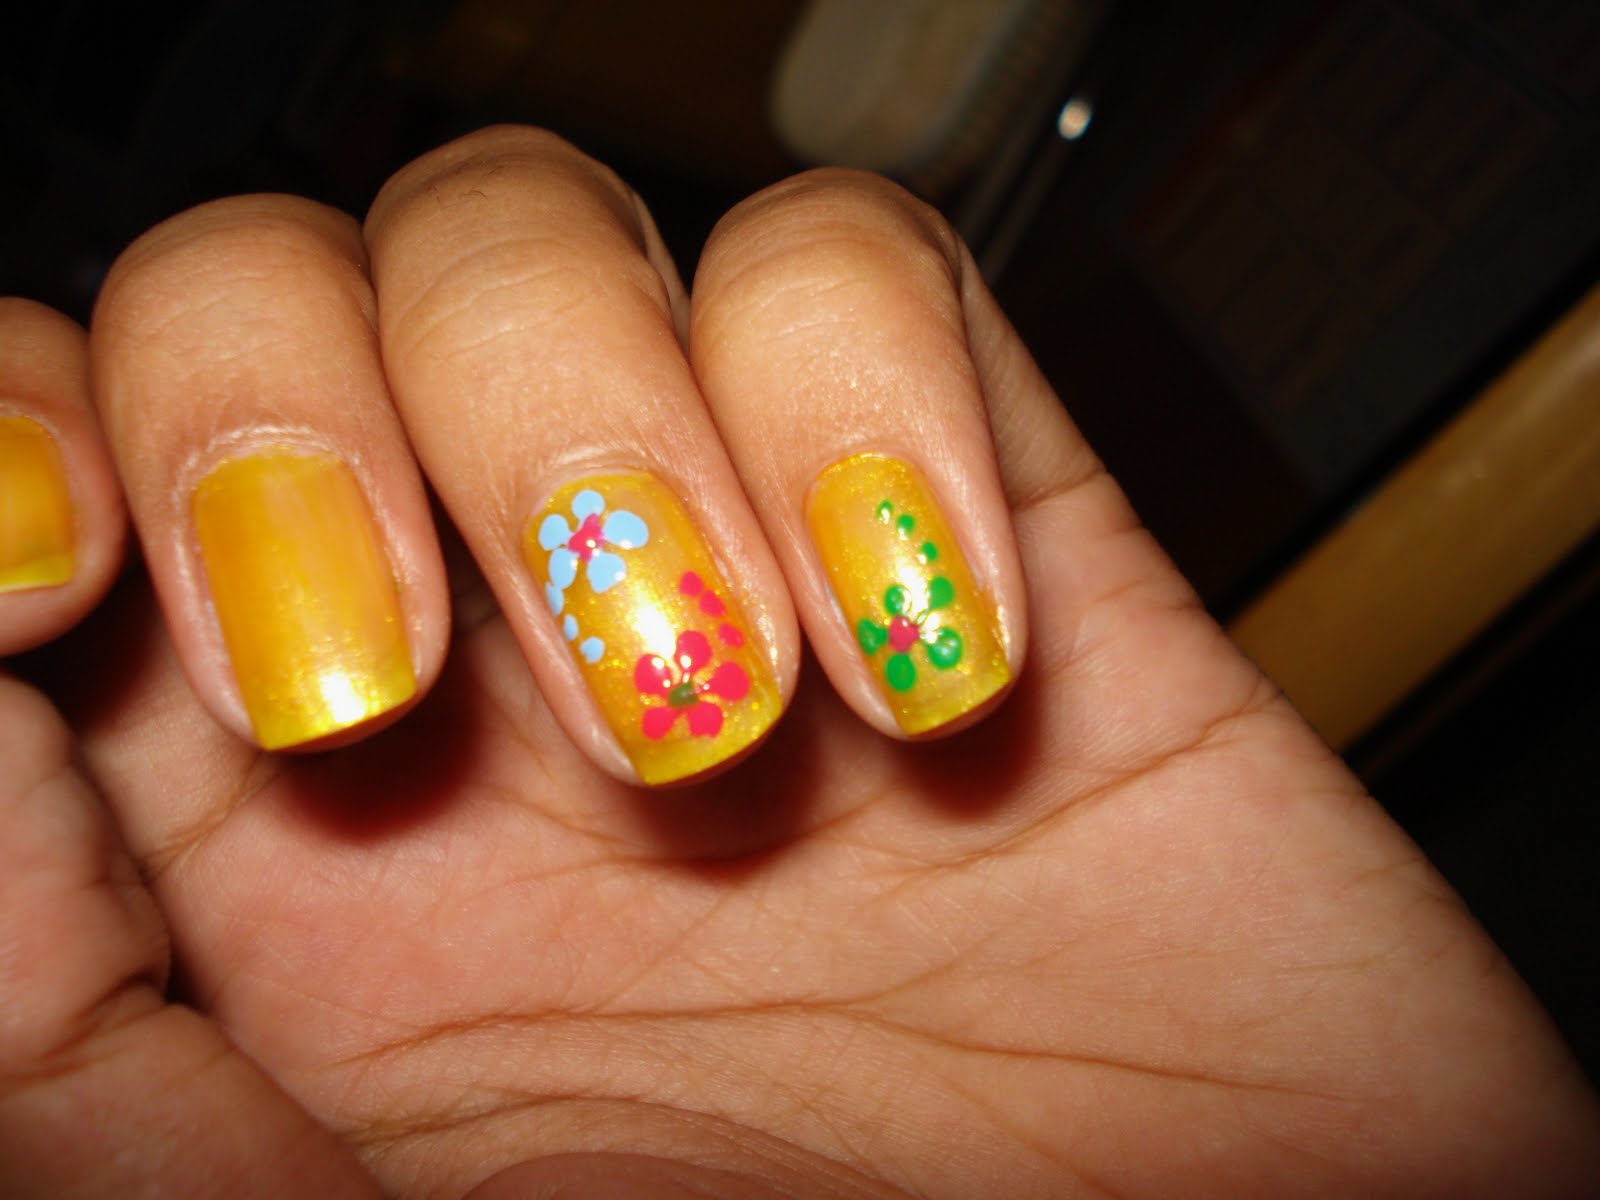
So today, I want to share with you the nail arts I made for the week. The first one, I called it Goldy Floweret’s which I made last Sunday and the second one is called Minty Loved Flower which I made tonight.  

Here’s the step by step instruction in achieving the Goldy Floweret’s Nail Art.  


Step 1.) Apply onto clean nails the L.A. Colors in Wave Length or any regular polish in Gold as your base coat. Let it dry.


Step 2.) Using the L.A. Art Deco in Sky Blue, Rose and Bright Green, create small five (5) dots and three (3) small dots to create a tail-like.   

Step 3.) Using a needle or aspili, feather the dots inwards to create a flower. Then, using the polish used in Step#2, put dots for colorful buds. Take note, you can put your choice of colors for the buds.


Step 4.) Lastly, always protect your work of art. Apply your favorite top coat. I'm using Caronia kwik-dry top coat.
So, there you go. That's your Goldy Floweret’s...  

Okay, for the Minty Loved Flower nail art that I made, forgive me but please bear with me, I so so love flower designs. I hope you aren't getting bore yet hahaha.  

Step 1.) As your base coat, apply onto nails the L.A. Colors in French Nails-Pink. Let it dry. The, after drying, create a French tip using the L.A. Art Deco in Mint Green. 
 

Step 2.) After the French tip dries, create five (5) dots by using L.A. Art Deco in White. Right after dotting, use the needle or aspili to feather the dots onto the center to create a flower.

Step 3.) Using the L.A. Art Deco in Yellow, put dots in each flower you created. 

Step 4.) And lastly, as I always said you should protect your nail art by applying a top coat of your choice.
 
 Hey beauties, its still summer. It’s not yet over hehehe. Have a cool summer nails now! This is so perfect for the current weather we have today. Weather is acting like its going to pour a lot of rain but at the end of the day, it did not. Well, I'm sure in the other places the rain really poured so hard. So lucky them! 

If you notice, I don’t have a photo of my toes done. I didn’t because I cut them so short last week when I started to use my 4 inches high heels. I have no choice but to cut my toe nails really short or else, it will damage my nails and will cause me a horrible pain. I was sad but now I’m okay, I already moved on (drama effect hehehe).

I hope you learned something again from this tutorial. I really appreciate you beauties of dropping by in my blog.

Stay cool!


Jenniya