

Anyway, I am back with a new nail art tutorial. Today I will share to you a tutorial inspired by Kiwi fruit.

Kiwifruit - often shortened to Kiwi in many parts of the world.

Kiwi Nail Art
So, let's get started.
Step 1. Prepare the nail polishes and other tools.
- Regular Black and White polish
- Frosted Light Green polish
- Toothpick
- Disc/ CD

Step 2. Apply the regular white polish onto nails. I did apply first a white polish before applying the light green polish to make the green more opaque.

Step 3. After the white polish gets dry, apply the light green onto nails. Apply three (3) coats for nice opacity.

Clean out the excess using a Q-tip soaked from polish remover.


Obtained the perfect same color by 3 coats. Yey!
Step 4. Using the white polish, brush it onto the middle your finger creating an oval shape.

Step 5. After drafting the oval shapes onto nails, put on thick amount of polish onto the oval. Then, take the toothpick and create streaks outward.
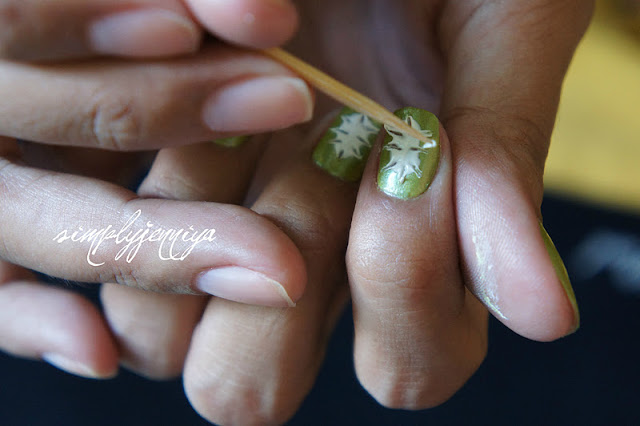
Step 6. Pour a little amount of black polish onto the disc/CD. Take the toothpick, dip onto polish and dot it in between of each streak.

Step 7. You're almost done! Now, apply a regular colorless polish to flatten the design.

Step 8. Of course, I always finished my nail art design with quick dry top coat.

There you have it. Isn't it so easy?
simply jenniya
Got questions? Comment below or click here.
