

I spent my rainy and cold Sunday at my Mom's house. It's been long time since our last visit. Before we headed to their house, we dropped by at Greenhills Shopping Center to do a little bit of shopping and bought pasalubongs for my family. Yesterday, I rocked my Sunday with my Green Smokey Eyes and in this post; I will be sharing a tutorial on how I did it.
Green Smokey Eyes
So, let's start beauties!
Prep your face.
Apply your moisturizer. After your skin absorbs it, apply BB Cream (well, this is optional). I used my angled foundation brush in applying the cream onto few parts of my face. Please see below my bare face with a pattern.
I do not apply BB cream all over my face because I don't need to. The patterns you see in the photo are most likely the temple parts that should be bright than the other parts because those parts are usually first seen by the people. Also it will give nice results in photos.
Then, using a large powder brush, apply your powder to set the cream and apply onto your whole face and don't forget your neck area.
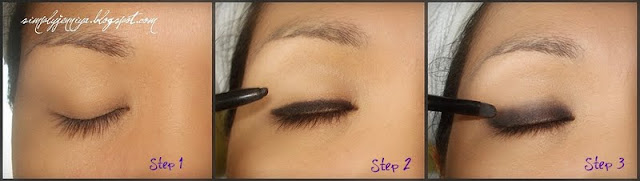
Transform your eyes (refer to the photos).
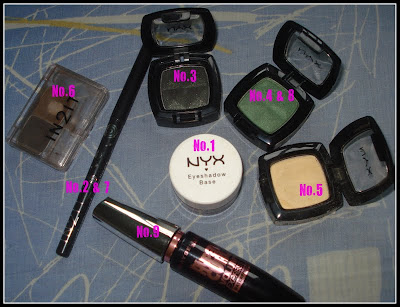
These are the items I've used in creating the green Smokey eyes. You can choose a color of your choice. You just need 2 colors of eye shadows; a dark and a lighter one.
(No.1) Apply eye shadow base. I used my fingers in applying my base to make the product warm.
(No.2) Line your upper lid with a black pencil eye liner. Then, take your small brush, and smudge the pencil shade; brush it upwards.

(No.3) Using flat eye shadow brush, this is optional, I pat on first the black matte eyeshadow then I apply the dark shade (Exotic Green) onto lids following the form of your eye socket.

(No.4) Using a fluffy eye shadow brush, take a lighter shade (Mermaid Green). Close your eyes and gently poke the brush onto middle of your eye socket. Gently deepen your poke and slowly half-open your eye. Then, start sweeping your brush side by side to your inner corner to your outer corner of the eye.

Do it also on your other eye. See how the eye shadow smoked-out? It was neat and blended.

(No.5) Using again your fluffy eye shadow brush, apply your highlighter onto your brow bone and sweep it below your eyebrow down to your inner corners. Sweep softly to blend.

(No.6) Define your eyebrows. In my case, using a slanted eye liner/ eyebrow brush, I used an eyebrow powder kit.

(No.7) Line your lower 1/3 lash line with black eye pencil (its okay if its messy) starting from the outer corner of your eyes, then use a cotton bud to smudge the pencil shade.

(No.8) Using a small brush, apply the lightest shade (Mermaid Green) to set it.

Use a Q-tip for a nicer smoke.

Line your upper and bottom waterline with black eye pencil.

(No.9) Curl your lashes and apply your favorite mascara. I apply 3 coats of very black mascara. Don't forget to put any shimmery white eye shadow in your tear duct area to pop your eyes more.
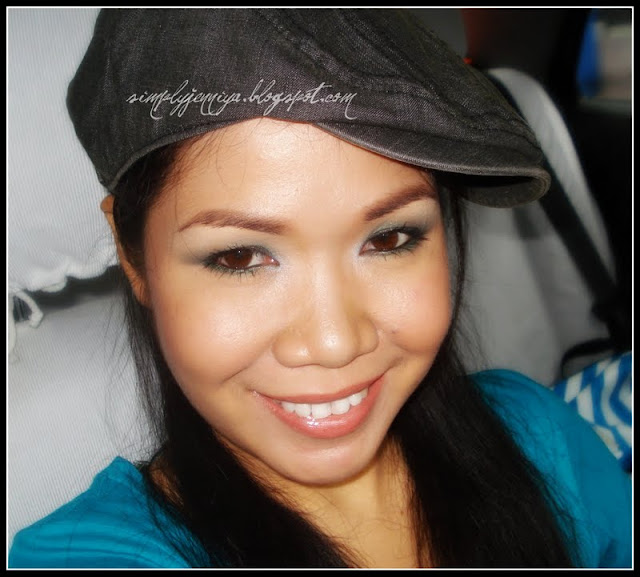
Here are shots of the finished product:

Semi-closed eyes

Half-opened eyes

Full-opened eyes
So, now that you're done with your Smokey eyes, clean any fall-outs of eye shadows. In my case, I used my large powder brush again with a powder on it and I brushed out the fall-outs.
Next thing is the rest of the face. Below is the photo of the products I've used.
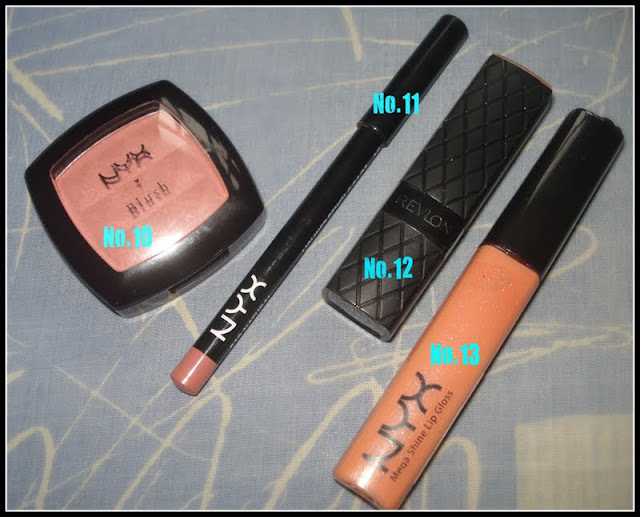
(No.10) Apply your favorite blush on. I used Spice of NYX.
(No.11) Line your lips will natural color.
(No.12) When you do Smokey eyes, it is best to have nude lips. Apply nude lipstick. I used Blush of Revlon Colorbursts Lipstick.
(No.13) Top it off with a nude lip gloss also. Apply it in your lower middle lips then pout once.

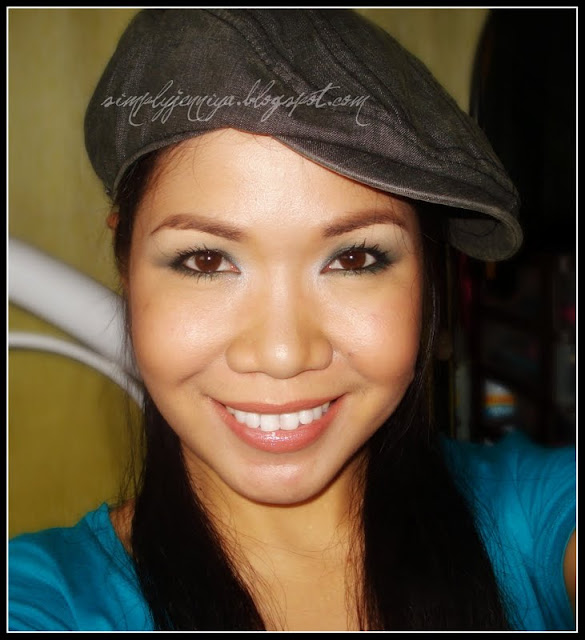
I have no available any green tees to wear yesterday but I think this blue green tee worked anyway.
Hope this tutorial helps. Until my next post beauties.
Much love,
Jenniya
