Showing posts with label NYX. Show all posts
I'm back again with a make-up tutorial. I just thought of this randomly. I supposed to make a tutorial of transforming your small eyes to bigger eyes using bright eye shadows but heck, I ended up playing with my dark eye shadows that it turned out dramatic. Lols!

Dramatic Bigger Eyes
I intentionally leave my other eye undone to see how big the difference it made.

To get us started, you just need a nude color and a very dark eye shadow.

Step #1. Prep your face.
I opted to apply my daily moisturizer (Myra-E with SPF 15). After the moisturizer is fully-absorb by the skin, I pumped a little amount of the BB Cream (Etude House in Refreshing) and I applied it onto face using my slanted foundation brush. I set my foundation with my favorite oil control powder (Palladium Rice Powder in Natural).

Step #2. Eyes - Base color
First, I apply my eye shadow base (NYX e/s base in Skintone) all over my lid and onto my lower lash line. Using my fluffy eye shadow brush, I applied a nude color (NYX single e/s in Highlight) all over my lid up to the brow bone.

Step #3. Eye lining
Using eye liner brush, I load a black matte eye shadow (Ever Bilena in Cleo) and lined my upper lash line. Starting a thick line from the outer going thinly inwards. I winged it a bit in the outer for a nice lift of the eyes.

Step #4. Crease
Using a bullet brush, I load it up with a dark brown eye shadow. I pointed the brush just below my brow bone or where your eye socket's higher depth, then I poked the brush in and I slowly glided the brush onto my eye socket moving inward and outward like a wiper. Take your eye blending brush and blend away the harsh edges. It will make a nice depth like you have a crease.

Step #5. Highlight
Using the fluffy eye shadow brush, I load it with white shimmering shadow (NYX  single e/s in White Pearl), and applied it in my middle eye lid, in the brow bone and in the inner corner of the eyes.

Step #6. Darken the shadow
(1) I load my bullet brush with black matte eye shadow (Ever Bilena in Cleo) and I darken my outer-V and the created crease earlier. Then, (2) using an eye liner brush, I also load it with the same black matte eye shadow starting thickly from the outer going inward up to inner 3rd only. 

Step #7. Finish the eyes
I lined my lower water line with a black eye pencil. I stroked a white eyeliner (ELF in white pearl) onto the inner corners of my eyes. For the eye brows, I used my IN2IT eye brow kit using my slanted eye brow brush.

Step #10. For the cheeks, I used my NYX Blush in Spice.
Step #11. For the lips, I used my NYX Megashine lip gloss in Beige.


This eye make-up is wearable in daytime, too. You just have to choose a not so dark shade like brown shade. I used black and darker brown in this tutorial to show the transformation of my bare eyes.

That's it. I hope you find my tutorial helpful. 


simply jenniya
Got questions? Comment below or click here.
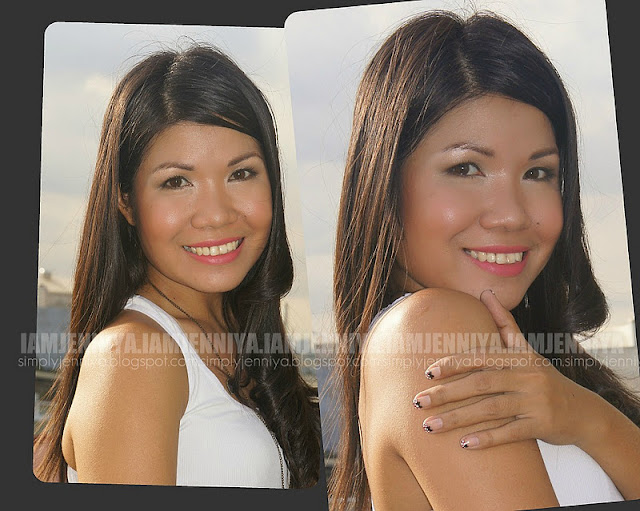


I posted the other day the ways on how I wore my basic white top and I came up with a simple make-up also to match with my outfit. Today, I am going to share with you the make-up tutorial on how I came up with this look. I actually just used two (2) color of eye shadows (a lighter shade and a dark shade) in this tutorial to justify the post title about a simple make-up.
A Simple Make-Up

Here are some products I've used in achieving this look. 

The step-by-step instructions:
Step #1. I skip with the moisturizer because I used my Etude House BB Cream in Refreshing. I squeezed out from the tube a small amount only and using my slanted foundation brush, I applied it evenly onto my face.

Step #2. I set my BB Cream by applying my IN2IT two-way foundation over it using my powder brush.

Step #3. Eyelids!
Apply the similar eye shadow color you have (it's like a mix of green & gray) using any small eye brush from the outer to the inner 3rds of your lower lash line.

Step #4. Crease!
Apply also any very dark brown eye shadow you have (provided it is matte) using a bullet brush from the outer to the inner 3rds of your lower lash line.

Step #5. Blend! Blend! Blend!

Step #6. Brow bone!

Step #7. Eye brows!

Step #8. Lash line!

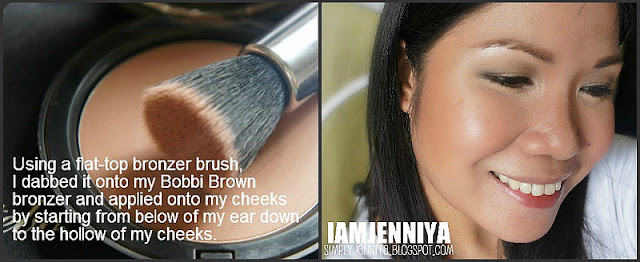
Step #9. Contour!
Then, bring it up by stroking at the sides of your face to create shadow that will give an illusion of slim face.. I also contoured my nose using a big eye shadow brush. Do not forget your jaw line also. To make it more natural, I stroke the remaining product in the brush lightly on my cheeks.

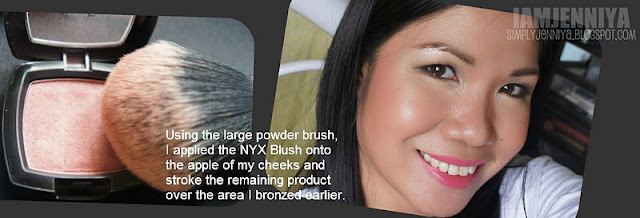
Step #10. Blush!

Step #11. I applied a very small amount of champagne eye shadow mixed with a Stila in Moonlight eye shadow onto the corner of my eyes to make my eyes pop more and to make my face look even brighter. 

Step #12. Curl your lashes and apply your favorite mascara. I used Maybelline Volum Express.

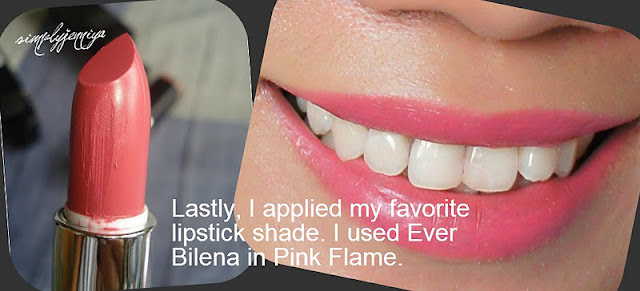
Step #13. Lips!

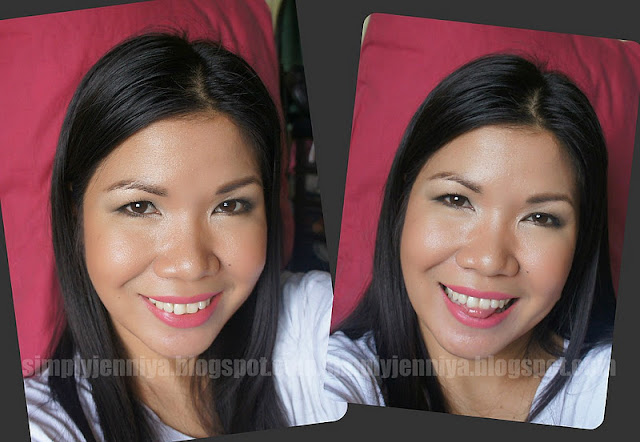
And you're done! Here are some bonus photos before I get my hair curled and get ready for the photo shoot with my hubby.

This make-up is perfect for an everyday wear to work. Skip the contouring and bronzing steps, I really find this make-up look just so quick and easy to do. Talk about NARCISSISM, I hope I didn't get you bored with all my faces. 

I hope you find my make-up tutorial helpful.

simply jenniya
Got questions? Comment below or click here.


So, what eye make-up should you wear with a gray dress? 

Believe me, if you are not confident enough in putting on your make-up like me especially in matching it with your outfit; you'll end up goggling for tips lol! Okay, so I found out that gray is a neutral color. Some said that you can wear any eye make-up, some said it's best to go for a smokey eye look, a purple look, a gray/ silver eye make-up, etc.

I end up with this look though:
 

The occasion I've attended to was held on daytime so I chose a more neutral look but sultry. Honestly, I received compliments with this make-up. It's so flattering most especially when the compliment came from my B's mom!

Bright Sultry Eye Make-Up

Products used:
Etude House Magic BB Cream in Refreshing
Bobbi Brown Stonewashed Nudes Palette
Etude House Single Eye Shadow in White
Stila Eye Shadow in Moonlight
NYX Blush in Spice
Wet n Wild in Retro Pink

Other products I've used but not in the photo:
Natural Rice Oil Absorbing Powder
IN2IT Eye Brow Kit
Maybelline Volum Express Mascara
NYX Lip Liner in Rose
MAC Sheer Vision Gloss


The STILA in Moonlight did a lot of brightening in my eyes. I really love this eye shadow. I just used this in my inner corners and tear duct areas. It is so pigmented; creamy and very sparkly.

Smile always and stay tuned.


Jenniya


Hi Beauties! 

As promised from my previous first EOTW entry, here's a quick post for my Eye Of The Week.

  
Cover Girl
Passion Plum / Rose Petal/ Faint Blush/ Whisper Soft

In this Cover Girl  Eye Enhancers Quad, I just used the 3 shades:
Inner corner/ Tear Duct Area & Brow Bone - Whisper Soft
Eye Lids - Faint Blush
Outer V - Passion Plum


==============================================

NYX
Pearl/ Highlight/ Eggplant/ Iced Mocha

I used these 4 NYX single eye shadows in my:
Inner corner/ Tear duct area - Pearl
Brow Bone - Highlight
Eye lid - Iced Mocha
Outer V - Eggplant


I've been very busy since last week. I've set aside blogging for the mean time. I am creating a website for our business and I'm almost finished with it but you know I still need to do some finishes before I officially publish it. 

Stay tuned and smile always.


 Jenniya

Hello Beauties!

Since the day I started using eye glasses, I got inspired to do eye make-up that will suit my new look. I'm concentrating on my eyes, of course. I used my latest "babies" - Elianto Colour Studio and Etude House to experiment my new eye looks. I'm so happy with how the Etude House eye shadow does its job. I was disappointed for Elianto but no big deal though. So, here are some photos that I want to share with you guys. These are the ones that been keeping me busy nowadays lols!

Eye Of The Week - Look 1: BASIC
 
 
Products used:
o NYX Eye Shadow Base in Skintone. 
o Bobbi Brown Eye Shadow in Nude.
 o Bobbi Brown Long Wear Gel Eye Liner in Sepia Ink.
o Nichido  Colour Intense Eye Pencil in Vivid Turquoise.
o IN2IT Mascara in Black.

Eye Of The Week - Look 2: WARM TOUCHES


Products used:
o NYX Eye Shadow Base in Skintone.
o Etude House Single eye shadows in White.
o Etude House Single eye shadows in Pale Light Blue.
o NYX Jumbo Eye Pencil in Milk.
o MAC Quad Eye Shadow in Garcon Gray & Bistro.
o Bobbi Brown Long Wear Gel Eye Liner in Sepia Ink.
o Nichido Colour Intense Eye Liner in Turquoise & Deep Plum.
o IN2IT Mascara in Black.

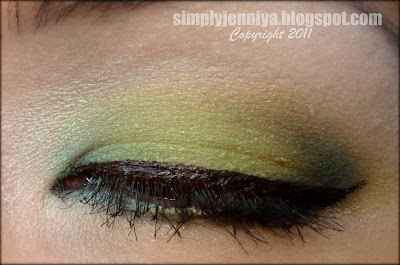
Eye Of The Week - Look 3: FOREST GREEN LOOK
 
 
Products used:
o NYX Eye Shadow Base in Skintone.
o Etude House Single eye shadows in White.
o MAC Quad Eye Shadow in Bistro.
o Elianto Colour Studio in Nile Green.
o Elianto Colour Studio in Young Lemon.
o Elianto Colour Studio in Celadon Green.
o IN2IT Liquid Eye Liner in Black.
o IN2IT Waterproof Eye Liner in Pearl.
o IN2IT Mascara in Black.

I've decided to make a series of EOTW (Eye of The Week) every month. I will do 2-3 eye look every week until I get tired doing it, lols! So, expect a load of different eye make-ups. I already started this week. Okay, so that's my EOTW's (Eye of The Week) for now. Hope you had fun. Until my next post beauties!

Smile always and stay tuned.


Jenniya


Hello beauties! Merry Christmas to everyone! I hope you all had a wonderful Christmas Eve last night. Well, I'm back again with a new FOTD. I hope you won't get tired of me doing again a make-up tutorial. You can close this window anytime and try to stop by again for a worth reading post in the future if you don't feel to read and see my post today hehehe.

My make-up tut for today is perfect for welcoming the New Year 2011. I got inspired to do a make-up using blues when I was keeping my new pair of shoes in a plastic shoe box.
 
Figliarina from SM Dept. Store. I actually bought two (2) new pairs of the same design but the other pair is Deep Purple. Love the colors! Yay!

Then, I remember Michelle Phan's tutorial that I've seen in her YouTube channel using blues. The striking color of my shoes made me recreate a Royal Striking Blue make-up afterwards. I'm so happy coz upon checking my eye shadow palettes; I had a lot choice of blues. Yey!

Royal Striking Blue


ooOO0OOoo
What I used in my eyes:
Be noted that I only used one (1) eye shadow labeled as ES27 and two (2) glitter colors labeled as G6 & G11 from this palette.

ooOO0OOoo
Step 1.
After putting on your foundation, eye shadow primer and lining my eye brows, I outlined my eyelids using a flat eye liner brush. I picked ES27 from the palette.

ooOO0OOoo
Step 2.
Fill in the outlined eyelids with ES27.


ooOO0OOoo
Step 3.
Apply also the ES27 in your lower lash line starting from outer line up to the middle in inwards strokes. After that, blend the eye shadow.
 

ooOO0OOoo
Step 4.
I applied the very blue glitter labeled as G6 from the palette using my finger onto the lids.

ooOO0OOoo 
Step 5.
I picked a silver glitter labeled as G11 from the palette and applied it around my tear duct area stroking inwards up to the middle of my lower lash line. Then, I tight line my lower water line rim with purple eye liner. If you have a blue, that would be perfect. It just happened that I don't have blue eye liner available, so I used my purple instead for alternative. 
 
 I winged it for a more dramatic effect.

ooOO0OOoo
Step 6.
Lastly for the eyes, I used a black liquid liner to line my upper lash line. Curl the lashes and I applied black mascara. 
Okay! You're done with the eyes.

ooOO0OOoo
Step 7.
I was emphasizing more on the eyes so take note that I intentionally put on a light blush onto the apple of my cheeks to look naturally glowing cheeks effect. I don't want to overwhelmed my face coz my eyes had glitters already. I used B3 from the palette. And lastly, using my finger, I picked a thin amount of Make Me Melt and applied the Sheer Vision lip gloss in the middle of my lips both from my MAC Intriguing Scarlet palette.
So now you're ready to party and welcome the New Year!

I was looking for an outfit something like blue in my cabinet but I realized that I never had one hehehe. I have eyed this very blue scarf that I haven't used for ages now. So I put it on just for photography purposes only. I just imagined that I'm in a cold country somewhere to justify it lols! But look, yeah the blue scarf matches my make-up. Now, I have added to my wish list a blue tee or a blouse or a dress. I'll grab one once I find any hehehe.

If you are attending a party either Christmas or a New Year's Eve Party, then you can put on your glamorous glittery dark outfits of blues and blacks to match your make-up. But seriously, this kind of make-up is also nice for just a basic outfit on. In my case, since I'm planning to do this make-up in New Year, and I and my B will be spending New Year with his family, I got in mind to get dressed decently but still looking sexy. So I think I can just match it with any off-shoulder blouse I have available (no no for a tee) to show off some skin and a pair of stainless earrings. I do not want to look so over made-up and over accessorize so just an earrings will do. For the bottom, I will match it with a mini-skirt or denim shorts and let's not forget my striking blue shoes (see photo above) hehehe.

Then, here are some hair-dos that I think will do. Note that I styled my bangs like there's a hump whatever you may call it. I used 2 hair clips to hold my "hump" at the back lols!:


 Or use a hair clump then style your hair out with spikes.

I still have New Year's Glam make-up to be posted soon. I recreated some tutorial I got from the beauty gurus from the YouTube. I already have some tutorials in mind to recreate and I'm quite excited to do that.

Smile always and stay tuned.


Jenniya